
How to Install Robin Storage on Google Kubernetes Engine (GKE)


Robin Storage on Google Marketplace
Google Kubernetes Engine (GKE) is a managed, production-ready environment for deploying containerized applications. GKE makes it easy to deploy, update, and manage containerized applications and services. GKE isn’t just for stateless applications either; you can attach persistent storage, and even run a database in your cluster.
Robin Storage is a purpose-built container-native storage solution that brings advanced data management capabilities to Kubernetes. It provides automated provisioning, point-in-time snapshots, backup and recovery, application cloning, QoS guarantee, and multi-cloud migration for stateful applications such as MariaDB, Confluent Kafka, Datastax, Elastic, InfluxData, MongoDB, Neo4j, Redis Labs, Enterprise DB, Splunk and Prometheus.
This tutorial walks users through a step-by-step guide to install Robin Storage on GKE. In this tutorial, we will:
- Create a GKE cluster with persistent disks
- Install Robin Storage through Google Cloud Marketplace
How to create a GKE cluster
To create a GKE cluster, you must log in to your Google Cloud account. If you don’t have an account, you can sign up for free.
Select or Create a project
Once you are logged in, you have to select a project to create a GKE cluster. If you would like to create a new project for this tutorial, here’s how to do it:
- Visit the Kubernetes Engine page in the Google Cloud Platform Console
- Click on “Select a project” in the top left section of the page

- Click on “New Project”
- Name your project (e.g. robin-mariadb-tutorial)
- Click “Create”
- Refresh the page, click on “Select a project”, and select the newly created project
- Wait for the API and related services to be enabled. This can take several minutes.
Start the Cloud Shell
Once the project is selected, let’s start the Cloud Shell to create the GKE cluster. Click on the “Activate Cloud Shell” icon on the top right section of the page.

You should see the Cloud Shell console similar to this:

Start the GKE cluster
We will create a GKE cluster that meets the prerequisites for installing Robin Storage. The GKE cluster prerequisites are:
- Ubuntu OS image
- Minimum 4 vCPUs and 4GB memory per node
- The Cluster has access to GCP disks and storage APIs. If you are not sure, select “Allow full access to all Cloud APIs” while creating GKE cluster
The following command creates a 2-node GKE cluster in the “us-west1-a” region. We are using the machine type “n1-standard-4” to meet the vCPUs and memory requirement and Ubuntu OS image.
Run the below command in shell:
export CLUSTER=robin-cluster export ZONE=us-west1-a gcloud container clusters create "$CLUSTER" --zone "$ZONE" --image-type=UBUNTU --machine-type "n1-standard-4" --num-nodes "2" --scopes "https://www.googleapis.com/auth/cloud-platform"
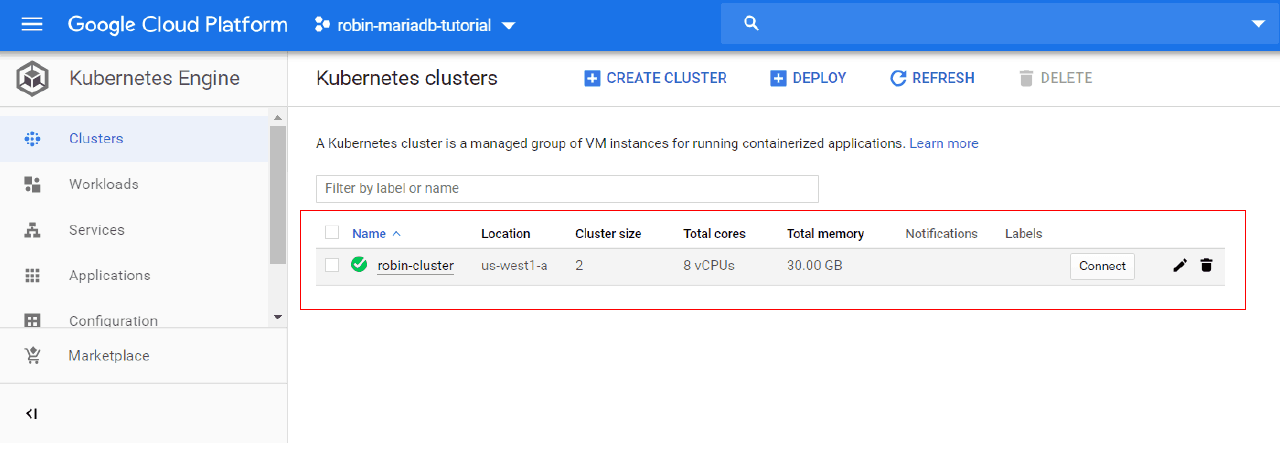
It may take a few minutes for the cluster to be created and ready to use. Once the cluster is ready you should be able to see it in your Google Cloud Console.
How to Install Robin Storage on GKE
Now let’s install Robin Storage to bring advanced data management capabilities to GKE. On your Google Cloud Console, click on the “Marketplace” tab on the left-hand side menu.

Search for Robin Storage in the marketplace and click on the Robin Storage app in the search results. Once on the Robin Storage page, click on the “Purchase Plan” button to enable Robin Storage on your Google Cloud Platform account.
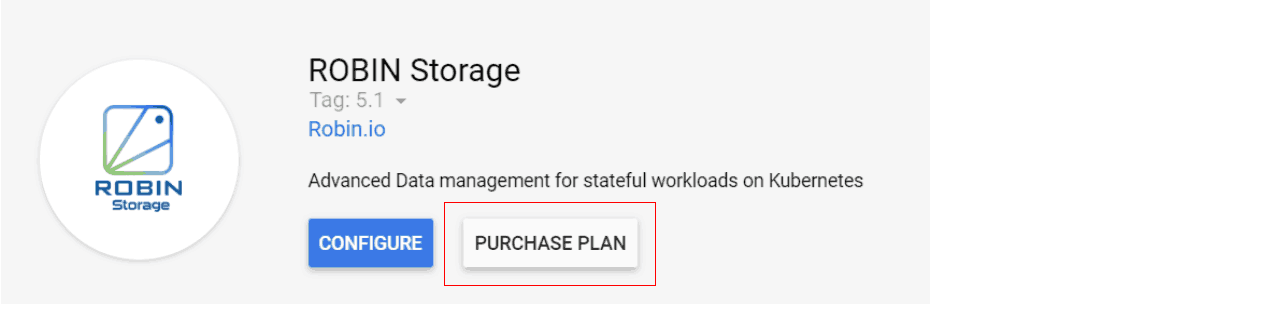
On the “Purchase Plan” page, go to the bottom of the page and click on “Purchase”. The plan should activate and you should return to the Robin Storage page. This time, click on the “Configure” button.
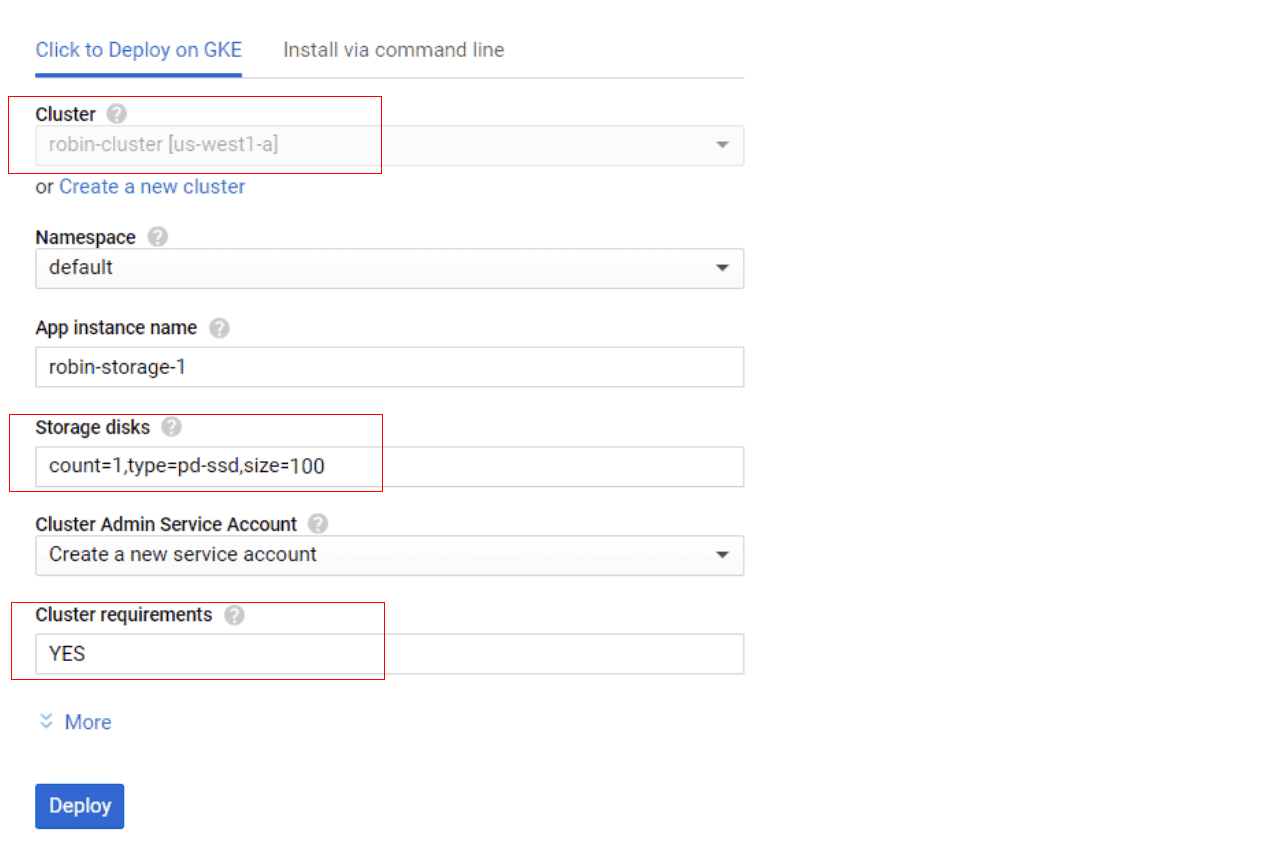
On the resulting screen, select the recently created cluster, and type “YES” in the “Cluster Requirements” textbox, as we know our cluster meets the prerequisites. In the Storage disks input field, let’s set size=100. Click on “Deploy” to install Robin Storage on your GKE cluster.
It may take a few minutes to complete the deployment. Once the deployment is complete you should be taken to “Application Details” page where you can see the Robin Storage application.
Get started with Robin Storage
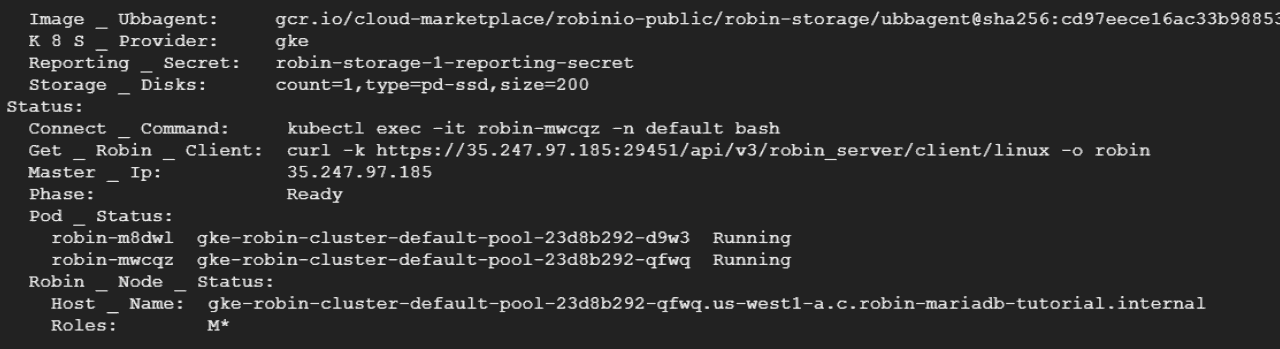
Once the installation is complete, you can get details about robin cluster by running following commands in the Cloud Shell.
# get status of the cluster $ kubectl describe robinclusters
The resulting output should have the connect-command to connect with Robin. If the “Connect_command” field has no value yet, it means Robin is still being installed in the background. Wait for a few minutes and try again.
Copy the command and run it to connect with Robin. After connecting to Robin container you can login as “admin” user. Default password is ‘Robin123’.
robin login admin
You can verify the installation by running
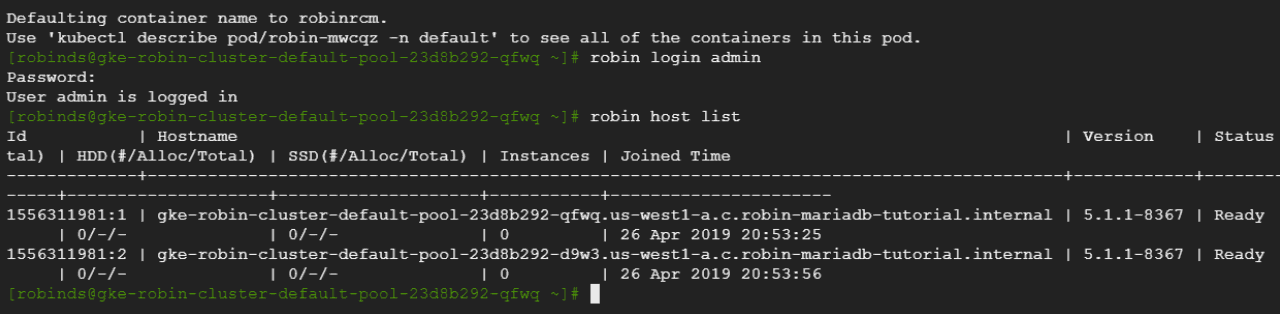
Let us setup Helm now. Robin has helper utilities to initialize Helm.
robin k8s deploy-tiller-objects
robin k8s helm-setup
helm repo add stable https://kubernetes-charts.storage.googleapis.com
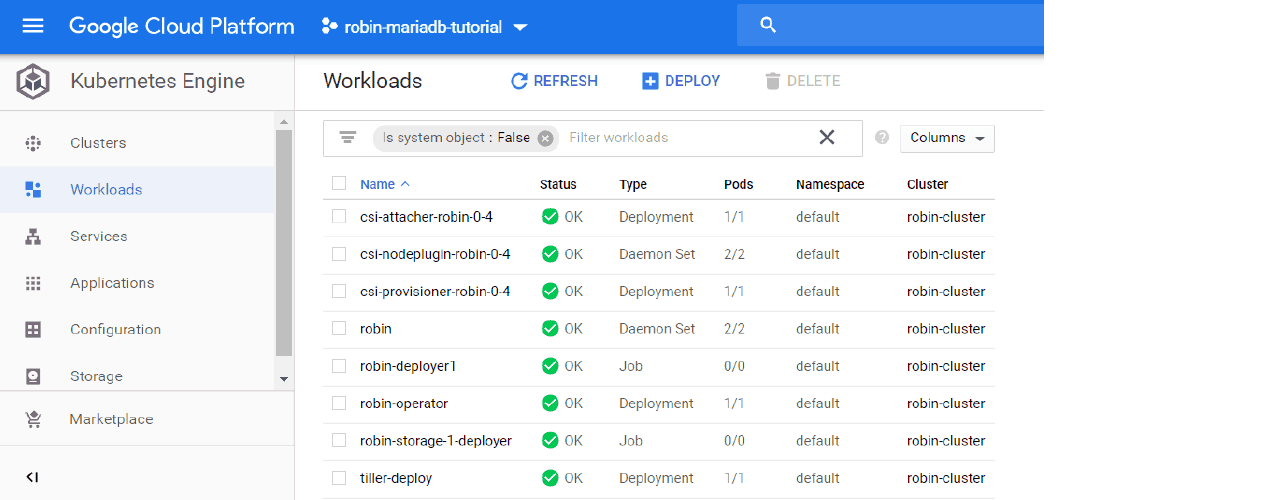
Before proceeding, let’s make sure all necessary workloads (pods) are running properly. Click on the “Workloads” tab on the left-hand panel, and wait for the status of all workloads to be shown as ”OK” with a green check next to them.
Once Robin Storage is deployed on GKE using Helm, you can deploy many different databases to bring advanced data management to your stateful workloads.
This concludes the Install Robin Storage on GKE tutorial. Also, here is a video if you prefer to view and follow the installation steps.
