
How to Deploy ElasticSearch on GKE using Helm


Robin Storage on Google Marketplace
In this tutorial, we will deploy an ElasticSearch database on Google Kubernetes Engine (GKE) using Helm and load data in the database.
Before you start this tutorial, make sure you have installed Robin Storage on GKE.
Let’s create an ElasticSearch database using Helm and Robin Storage. In the Cloud Shell run the following command. The command will install ElasticSearch in a three-master node configuration. We are setting the storageClass to robin-0-3 to benefit from data management capabilities Robin Storage brings.
helm install stable/elasticsearch --name users --set master.persistence.storageClass=robin-0-3 --set master.persistence.size=2Gi --set data.persistence.storageClass=robin-0-3 --set data.persistence.size=5Gi --tls --tiller-namespace default
Before proceeding, let us make sure all necessary workloads (pods) are running properly. Click on the “Workloads” tab on the left-hand panel, and wait for the status of all workloads to be shown as ”OK” with a green check next to them.
Let’s confirm that our Database is deployed and all relevant Kubernetes resources are ready.
helm list -c films --tls --tiller-namespace default
You should be able to see an output showing the status of your ElasticSearch database.

Get the name of the client pod of your ElasticSearch database by running the following command.
export CLIENT_ADDRESS=$(kubectl get pods --all-namespaces --field-selector=status.phase=Running | grep users-elasticsearch-client -m 1| awk 'BEGIN {FS=" "}; {print $2}')
Add an index called ‘test-index’ on the client pod. This is where we will add our data with the following command:
kubectl exec -i ${CLIENT_ADDRESS} -- curl -X PUT http://localhost:9200/test-index
Adding data to the ElasticSearch database
Add a user named Bob to the test-index we created above.
kubectl exec -i ${CLIENT_ADDRESS} -- curl -H 'Content-Type: application/json' -XPOST http://localhost:9200/test-index/test/1 -d '{"name":"Bob"}'
Verify that a user named bob has been added to the database on the index we created by running the command:
kubectl exec -i ${CLIENT_ADDRESS} -- curl -X GET http://localhost:9200/test-index/_search?pretty
You should see an output similar to the following:
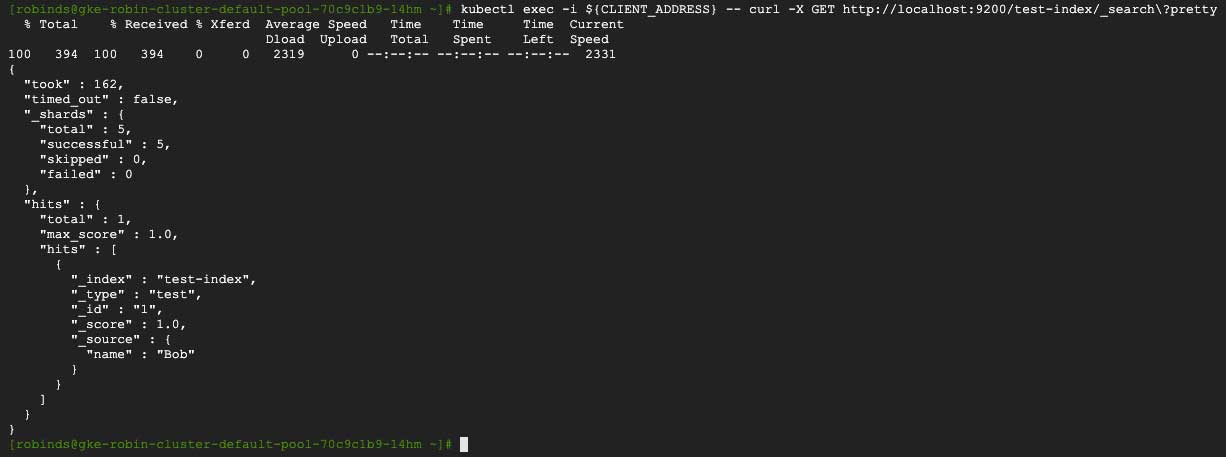
We have now deployed an ElasticSearch database on GKE with a user named Bob added to our ElasticSearch database.
To benefit from data management capabilities Robin brings, such as taking snapshots, making clones, and creating backups, we have to register this ElasticSearch Helm release as an application with Robin.
Registering the ElasticSearch Helm release as an application
Registering this ElasticSearch Helm release as an application will enable Robin map and track all resources associated with the Helm release for this ElasticSearch database. To register the Helm release as an application, run the following command.
robin app register myusers --app helm/films
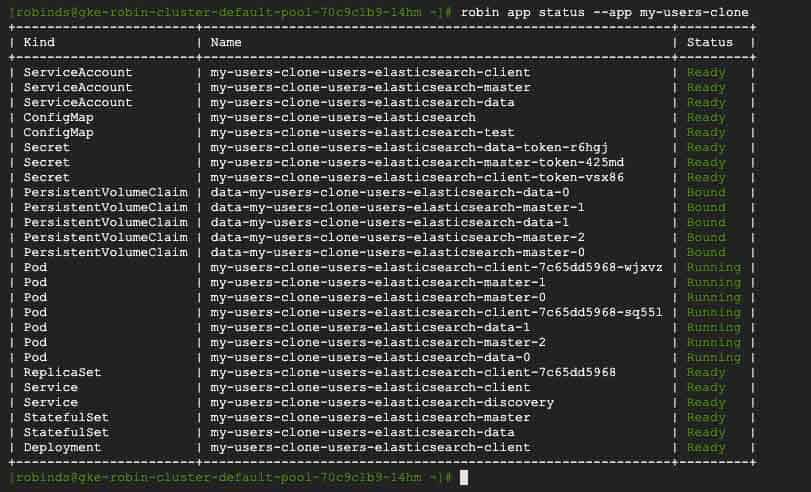
Let’s verify Robin is now tracking our ElasticSearch Helm release as a single entity (app) by running the following command.
robin app list --name myusers
You should see an output similar to this.

We have successfully registered our Helm release as an app called “myusers”.
This concludes the Deploy ElasticSearch on GKE tutorial. Now that we have deployed the ElasticSearch database, loaded data, and registered the ElasticSearch Helm release with Robin, we can create an ElasticSearch database snapshot and create an ElasticSearch clone including app plus data.
Snapshot ElasticSearch on GKE Tutorial
Clone ElasticSearch on GKE Tutorial